
-
Photo/Illustration: Susan Kahn
-
Hard-working black plastic mulch speeds growth, checks weeds, and holds in moisture.Photo/Illustration: Susan Kahn
-
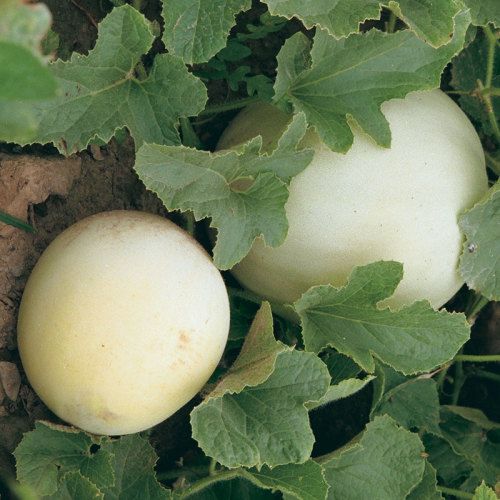
'Morning Ice' needs three months to mature. The icy green skin becomes yellowish when the fruit is getting ripe.Photo/Illustration: Susan Kahn
-
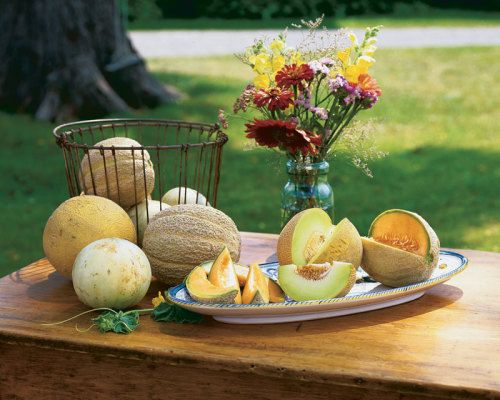
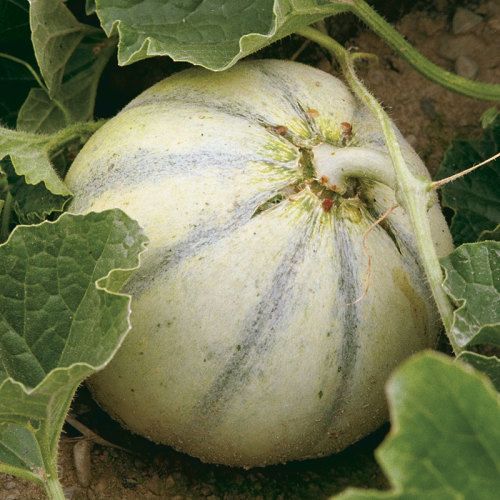
A homely exterior holds great golden treasures within. The beige undertone on this 'Savor' Charentais signals that, beneath the warts and cracks, perfumed and flavorful flesh awaits.Photo/Illustration: Susan Kahn
-
The flesh of 'Passport', a honeydew hybrid, typically is green, though occasionally you'll find one that's orange inside.Photo/Illustration: Susan Kahn
-
At half slip, all it takes is a slight tug to harvest a melon.Photo/Illustration: Susan Kahn
-
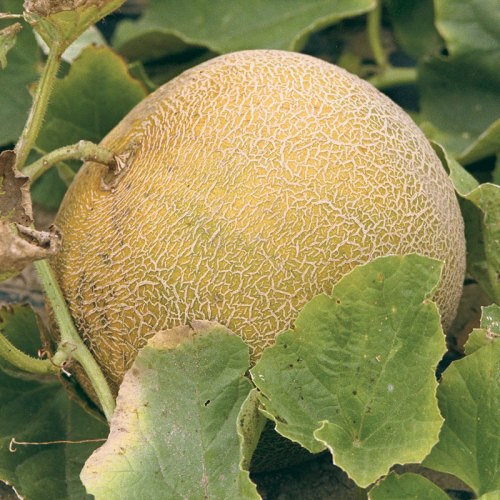
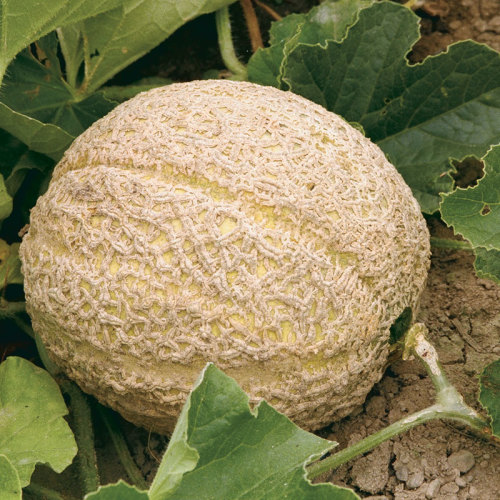
At full slip, melons sometimes pick themselves. Heavily netted 'Gold Star' is the best-tasting cantaloupe the author grows.Photo/Illustration: Susan Kahn
-
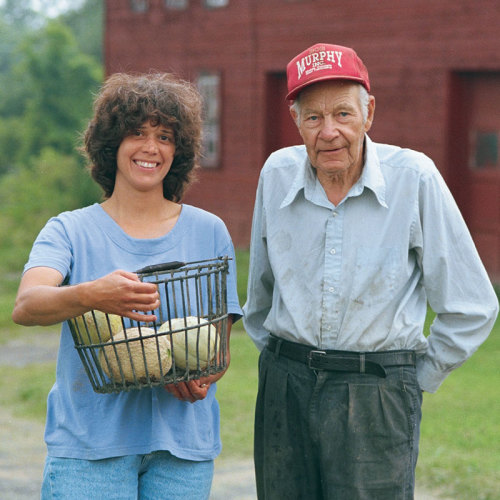
The author with her friend and neighbor Slim Bunk.Photo/Illustration: Susan Kahn


When I moved from suburbia to a farm, I didn’t let the fact that I’d never planted a fruit or vegetable deter me from starting my own agricultural enterprise. After talking to people and reading several articles, I decided to grow melons. My inexperience showed. Neighbors gawked at my crooked rows, and maintained a stunned silence when they learned I’d planted more than 600 seedlings with a soup spoon because I didn’t own a trowel.
 |
|
| The author with her friend and neighbor, Slim Bunk. |
Eventually my neighbor Slim Bunk decided to help. In an unassuming way, he showed me his garden and inquired about my crop. He gave me a string line and helped me plant my first straight row. Slim taught me to identify weeds and bugs, to drive a tractor, and to recognize and solve problems before they grow into disasters. At 83, he remains my mentor and the first person with whom I discuss new ideas.
Thirteen years have passed since I harvested that initial, unsightly melon patch. Despite my naïveté, I had a beautiful crop. Since 1983, I’ve sold melons at the local farmers’ market. Even at the height of the season, with 1,200 melons, I sell out. Locally grown melons are so luscious, they expose store-bought ones as flavorless imitations. By using a few simple tricks, you can enjoy them, too.
Long-season melons taste best
The term muskmelon describes a range of fruits that includes cantaloupes, honeydews, Cranshaws, and Charentais. Taste is my main criterion when choosing varieties. With few exceptions, I’ve discovered that only full-season melons possess the flavor I desire. These varieties, which mature in 11 to 13 weeks, meld fragrance and texture with a rich melon tang.
| If you love cantaloupe, the sweet, full-bodied flavor of ‘Gold Star’ is unsurpassed. At 87 days to maturity, ‘Gold Star’ has the longest season among my picks. An earlier melon that tastes very good and offers some disease resistance is ‘Summet’.
For honeydews, I like ‘Passport’ and ‘Morning Ice’. ‘Passport’ is unusual because it is early (73 days) and flavorful. My experience with ‘Passport’ is that the first-set fruits have excellent taste, but later-set fruits aren’t quite as good. ‘Morning Ice’ is an outstanding-tasting, full-term honeydew. Melon connoisseurs who want a real treat should consider growing ‘Savor’, a French Charentais melon. Charentais are small, about 2 lb., and round, with gray-green rind and deep orange flesh. They are renowned in Europe for their exceptional flavor, but are relatively unavailable in American markets. |
 The flesh of ‘Passport’, a honeydew hybrid, typically is green, though occasionally you’ll find one that’s orange inside. |
|
 |
 |
|
| ‘Morning Ice’ needs three months to mature. The icy green skin becomes yellowish when the fruit is getting ripe. | A homely exterior holds great golden treasures within. The beige undertone on this ‘Savor’ Charentais signals that, beneath the warts and cracks, perfumed and flavorful flesh awaits. |
Melon connoisseurs who want a real treat should consider growing ‘Savor’, a French Charentais melon. Charentais are small, about 2 lb., and round, with gray-green rind and deep orange flesh. They are renowned in Europe for their exceptional flavor, but are relatively unavailable in American markets.
[[[PAGE]]]
In short-season areas, start melons indoors
To get full-season melons to mature in my upstate New York garden, I start them indoors and plant them right after the frost-free date. Melons can’t stand freezing temperatures, but I usually risk an early planting, anyway. If you decide to do the same, and set plants out before the last frost, be prepared to protect them with row covers, hot caps, or newspaper.
I start melons three to four weeks before my frost-free date. Although it’s tempting to begin sooner, I don’t. Melons should be growing rapidly when they go into the garden. Plants kept too long indoors become rootbound and stunted.
I use cell packs that are 1-1⁄2 in. in diameter and 3 in. deep. It’s okay to use slightly larger cells, but not smaller ones. I fill the cells with a sterilized, soilless mix, and plant two seeds per cell, placing them 1⁄2 in. to 3/4 in. deep. Melons germinate at 75° to 80°F in moist, but not saturated, conditions. Once my seedlings pop up, I fortify them weekly with a solution of Miracle-Gro or some other balanced fertilizer. Melon seedlings require plenty of light. Green, stocky plants are a sure sign of properly developing, healthy melons.
When my seedlings have developed their first true leaves (at two to three weeks old), I prepare them for outdoor conditions by setting them outside and gradually increasing their exposure to wind and sun. Like other seedlings, melons taken from indoor conditions and planted directly in the garden may not survive the shock.
Outdoor melon culture for any location
Despite folklore that melons require an abundance of precipitation and heat, I have discovered they perform best with average to moderate rainfall and temperatures in the mid 80s. But don’t worry if you live in an area where summer scorchers send temperatures into the 90s and 100s. Once established, melons can take the heat.
Melons like well-drained, fertile ground. In autumn, I turn composted manure into my future melon patch. Come spring, I rework the ground. At this time, I also incorporate 3 to 4 lb. of 5-10-10 fertilizer (10-10-10 is okay, too) per 100 sq. ft. of garden, thoroughly raking it into the top few inches of soil.
 |
|
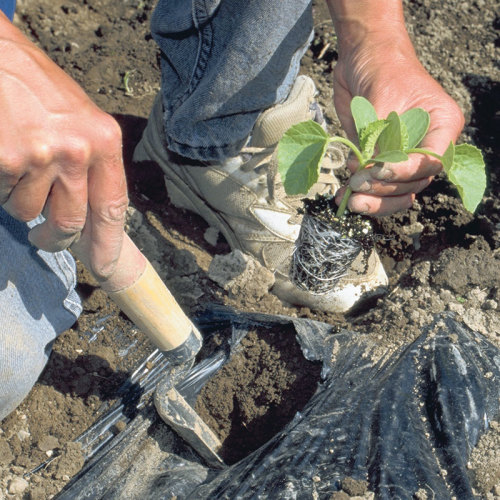
| Hard-working black plastic mulch speeds growth, checks weeds, and holds in moisture. |
Black plastic speeds growth. In short-season areas, using a black plastic mulch is key to successfully growing full-season melons. Plastic warms the soil, prevents weed germination, and helps retain soil moisture. Since water cannot penetrate unperforated plastic, I try to lay the mulch when the ground is moist but dry enough so footprints don’t leave shiny impressions. To anchor the plastic, I cover all the edges with dirt.
It’s true-melons need room. I set mine 3 ft. apart within the row and leave 6 ft. between rows. If space is limited, your melons will do fine on a 30 in. by 5 ft. spacing. Although I’ve never tried this myself, I have read about gardeners who successfully manage to grow melons on vertical trellises.
I punch holes in the plastic where the melons will grow. Before I put my first plant in the ground, I thoroughly water all the seedlings. Except for a few seeds that fail to germinate, I have two melon plants per cell. I keep these seedlings together and plant them in the same hole. Melons do not like to have their roots disturbed, so I gently remove plants from the containers. After loosening the soil in the hole with a trowel (I did make this worthwhile investment), I plant my seedlings about an inch deeper in the garden than they were in the cells.
Water well at planting time. I try to water melons within 30 minutes of planting. They need about 2 cups per planting hole to assure proper soil-to-root contact. To get my plants off to a quick start, I add a tablespoon of 20-20-20 soluble fertilizer per gallon of water.
During any growing season, there are times when melons need more water than nature provides. If it hasn’t rained for a week, I recommend a good soaking. Melons are particularly sensitive to parched conditions at planting, when they begin to vine out, and as their fruits begin to size-up.
Immediately after planting, I drape melons with a row cover like Reemay. Anchored every 3 ft. with a half-shovel of dirt, the row cover rests directly on top of the plants. I remove it as soon as the first flowers appear so bees can pollinate the blooms. Although the row cover stays on my crop for only two or three weeks, its benefits last the entire season. Row covers provide about two degrees of extra frost protection, accelerate plant development, and protect seedlings from strong winds and airborne insects. In addition, melons started under row covers mature a week or two earlier than their uncovered counterparts.
Protect melons from weeds, pests, and disease. Although weeds won’t grow directly under black plastic, they will pop up in the holes you’ve made for plants and in between rows. If you’ve used a row cover, you’ll discover that weeds, as well as melons, have taken advantage of its benefits. I eliminate these competitors while they are still young and too little to adversely affect my plants.
Striped cucumber beetles are pernicious pests in my garden. They arrive in June and damage melons by chewing on plants and spreading bacterial virus. Adult beetles are yellow, 1⁄4 in. long, and have three black stripes on their wings. Sprays and biological controls are available to curtail these nasty bugs. If you don’t want to use pesticides, row covers offer some protection.
Powdery mildew is another problem. This talcumlike growth first appears in July as small white spots on older melon leaves. These spots grow and spread. Because powdery mildew reduces the photosynthetic capability of plants and thus sugar production, it causes melons to be less sweet. Of my varieties, only ‘Summet’ is tolerant to this disease. But all is not lost if powdery mildew gets into non-resistant varieties. Your first crop of melons will be well established before the mildew takes hold. The negative effects, therefore, will be more pronounced on later fruits.
[[[PAGE]]]
Reaping the rewards
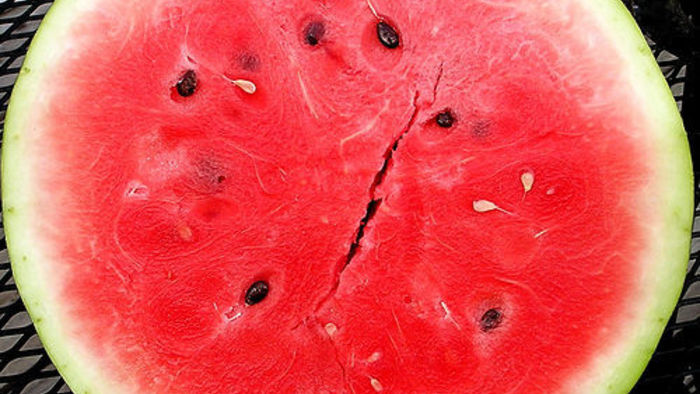
As harvest approaches, melon vines shift energy from producing leaves to ripening fruits. So don’t be surprised if the mature melon patch looks peaked compared to the lush growth of early summer. I usually harvest four to six melons per plant. All the ones I grow except ‘Savor’ and ‘Morning Ice’ practically pick themselves. When ripe, they “slip” from the plant by disconnecting from the vine.
 |
|
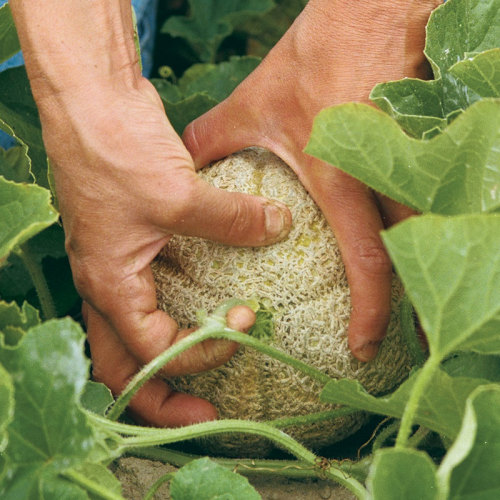
| At half slip, all it takes is a slight tug to harvest a melon. | |
 |
|
| At full slip, melons sometimes pick themselves. Heavily netted ‘Gold Star’ is the best-tasting cantaloupe the author grows. | |
| More about muskmelons…
• Ways to serve muskmelon |
Muskmelons turn from green to beige, and then to beige with yellow undertones as they ripen. When you begin to smell their aroma, your melons are almost ready. Whenever I spot a melon with a yellow undertone, I examine where that fruit joins its vine. The melon is ripe when a gentle tug releases the fruit. This stage is called half slip. A dead-ripe melon will eventually disengage itself from the vine. This is full slip. The time from half slip to full slip is, at most, two days. To limit the number of fruits I “share” with mice and other unwelcome garden creatures, I check them every day and pick them at half slip. Healthy vines continue to set fruit well into summer, but in my climate, late-set fruits don’t ripen.
Charentais melons like ‘Savor’ will not slip, but they will start to separate from the vine. By the time ‘Savor’ is ready to harvest, it often has warts and cracks, and is as homely as it is delicious. I pick ‘Savor’ when its skin has a beige undertone and when a hard tug detaches the fruit. I don’t cut Charentais from the vine.
Like ‘Savor’, ‘Morning Ice’ may require a strong tug before it disengages from the vine. It tends to split before reaching maturity. I allow split fruits to ripen because I’ve discovered that only a small portion of the melon needs to be discarded. Although it’s difficult to judge quality by appearances, I’ve found that heavy netting (the maze of rough webbing on the melon’s surface) is a sign of superior taste in cantaloupes. As a market gardener, I tend to leave slick-looking fruits of ‘Goldstar’ and ‘Summet’ in the field, but you’ll want to eat every melon you grow.
by Laurie Todd
June 1997
from issue #9


Comments
Log in or create an account to post a comment.
Sign up Log in