

How to Grow Carrots
Plant them right and pamper them afterward for a sweet harvest
-
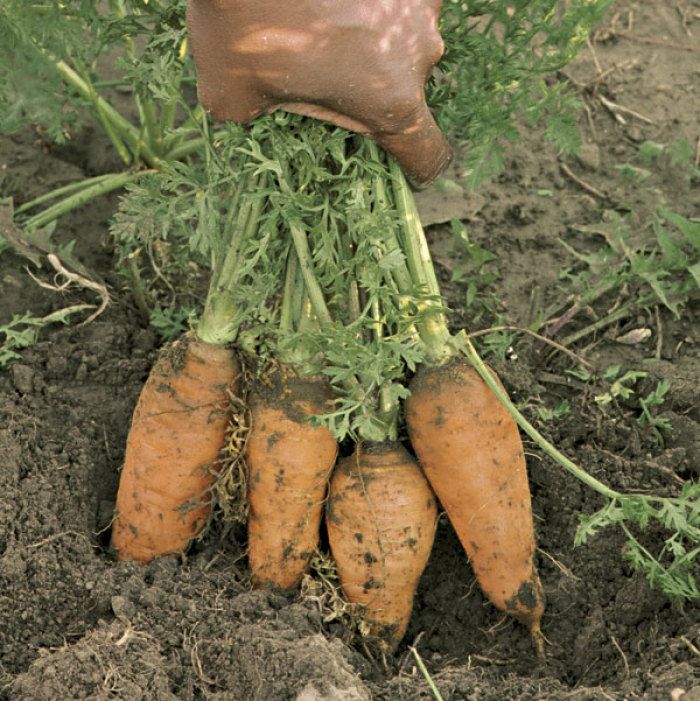
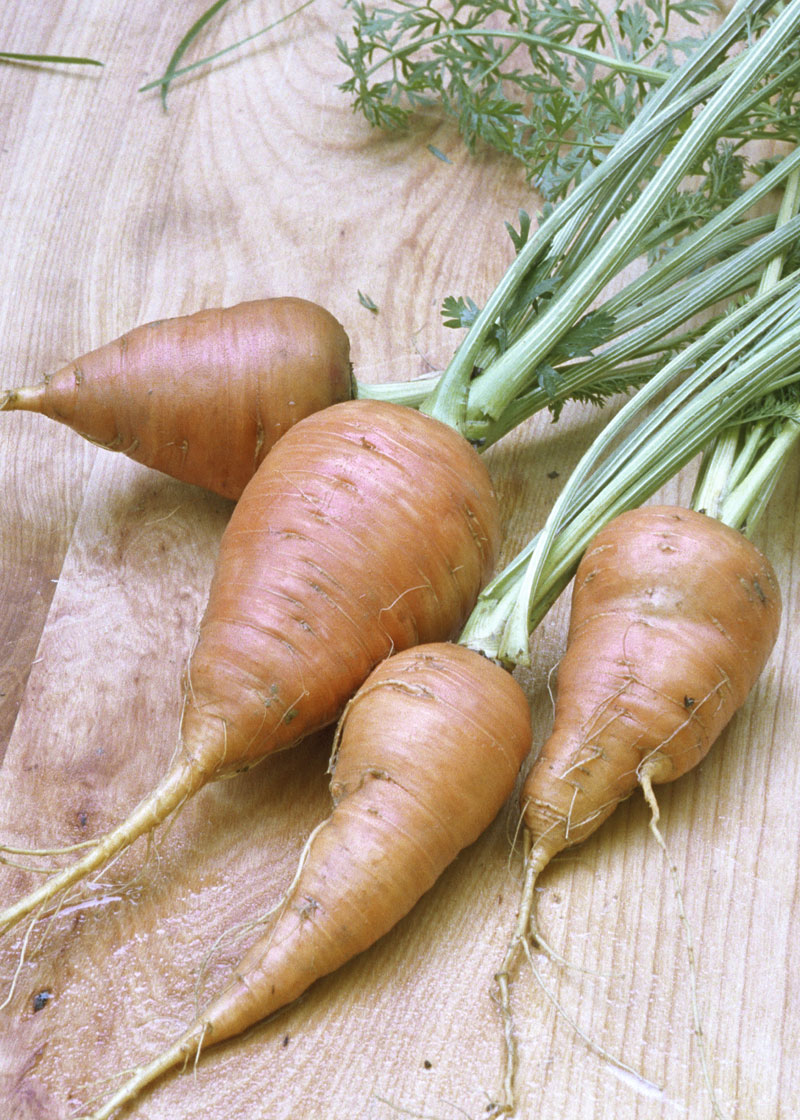
A sweet harvest of full-size carrots is the reward for improving your soil with well-rotted organic matter. Photo: Janet Jemmott
-
Photo/Illustration: Janet Jemmott
-
Photo/Illustration: Janet Jemmott
-
Photo/Illustration: Janet Jemmott
-
Photo/Illustration: Janet Jemmott
-
Photo/Illustration: Janet Jemmott
-
Photo/Illustration: Janet Jemmott
-
Photo/Illustration: Janet Jemmott
-
Photo/Illustration: Janet Jemmott
-
Photo/Illustration: Janet Jemmott
-
Photo/Illustration: Janet Jemmott


When was the last time you had a really good carrot? One just pulled from the ground on an early fall morning, while its feathery green top was still wet with the melting frost. A carrot that crunched so loud the noise rattled your bones and woke up the birds; a carrot so sweet that your taste buds exploded with joy. If you have never experienced carrots like this, or doubt that you could grow such carrots, read on. When all is said and done, carrots are surprisingly easy to grow, and they tolerate great differences in growing conditions and technique. Carrots need steady watering—especially early on—and regular weeding, but that’s about as finicky as they get.

Daucus carota, the humble carrot, which has become one of our staple vegetables, originally came from Afghanistan. Unlike today’s varieties, which are predominantly orange, that first carrot was probably scrawny, hairy, and maybe even purple. The carrots that appeared around the 12th century in Europe were likely to have been a rainbow of reds, yellows, oranges, and even white.
Carrots are one of the best-known members of the Umbelliferae. Their culinary cousins include parsley, celery, parsnip, fennel, anise, dill, coriander, caraway, and cumin, to name a few.
Those of us old enough to remember know how rare it used to be to encounter dry, flavorless carrots. In today’s world of mass-produced foods that must survive the rigors of heavy chemical support, machine harvesting, handling, and packaging, you are just as likely to be disappointed as bowled over. There is no guarantee that the carrots in the local grocery store will actually delight your taste buds and provide the nutrition you expect and need. One of the best ways to be sure about your carrots is to grow your own.
A bushel of carrot varieties
In the early 1900s, beta-carotene, which is converted in the body to vitamin A, was isolated in carrots and associated with orange and yellow colors in food. Since then, carrot breeders have worked to breed other colors out of carrots. A bright orange carrot such as ‘Artist’, or one with deep purple on the outside and bright orange-yellow on the inside, like ‘Dragon’, is the result of efforts to increase the levels of beta-carotene.
Besides boosting the level of beta-carotene in carrots, breeders have developed scores of cultivars offering a variety of characteristics. There are crosses and hybrids that address a particular market or processor demand, as well as those that may just be a breeder’s dream carrot.
Carrots are grouped into three types: Chantenay (or Kuroda, if it originated in Japan), Nantes, and Imperator. These are further subdivided into groups according to purpose: fresh market, processing, and storage. Two other specialty groups include round and baby carrots. Some of these smaller carrots, such as ‘Thumbelina’ and ‘Minicor’, work exceptionally well in container gardens.
Carrots range in shape and size from golf balls to scimitars. Catalogs describe carrots as coreless, stumpy, tapered, or heavy-shouldered. How do you know which one to grow? I try to pick varieties that will grow well in my soil. If your garden has shallow topsoil (6 to 8 inches), look for a stumpy, heavy-shouldered Chantenay or Kuroda. On the other hand, if you are lucky enough to have loose topsoil that is a foot or more deep, pick an Imperator variety described as coreless, with long slender roots. If you have raised beds or loamy or sandy soil, a Chantenay or Nantes carrot will be best.
Many Imperator carrots are actually crossed between Nantes and Imperator types; this offers the best of both worlds. Varieties such as ‘A-Plus Hybrid’, ‘Long Tapered’, ‘Gold Pak’, ‘Apache’, ‘Sunrise’, ‘Bolero’, and ‘Cheyenne’ have been developed for the California climate, but they have also worked well for me under less favorable conditions.
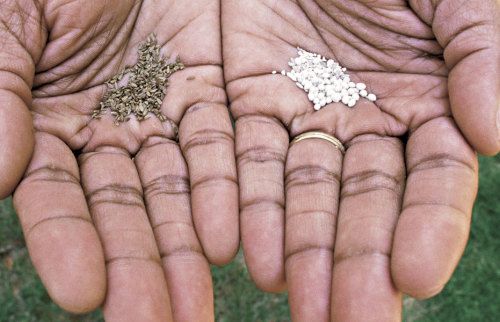
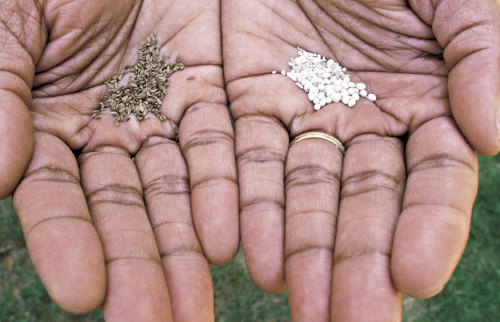
With a coat or without—selecting your seed
 |
|
| Coated seeds (at right) are easier to handle and easier to space than uncoated seeds (left), diminishing the need to thin plants later in the season. | |
After you determine which varieties to grow, you must decide if you want coated or naked seed. Carrot seeds are sometimes coated with a layer of bentonite clay. This makes them more evenly sized and helps to maintain uniform moisture around the seeds during germination. They may also be treated with fungicide. I have used coated seed (sometimes called pelleted) for several years and prefer it because it is easier to handle. It falls from my planter better and is easier to see when I want to check to space.
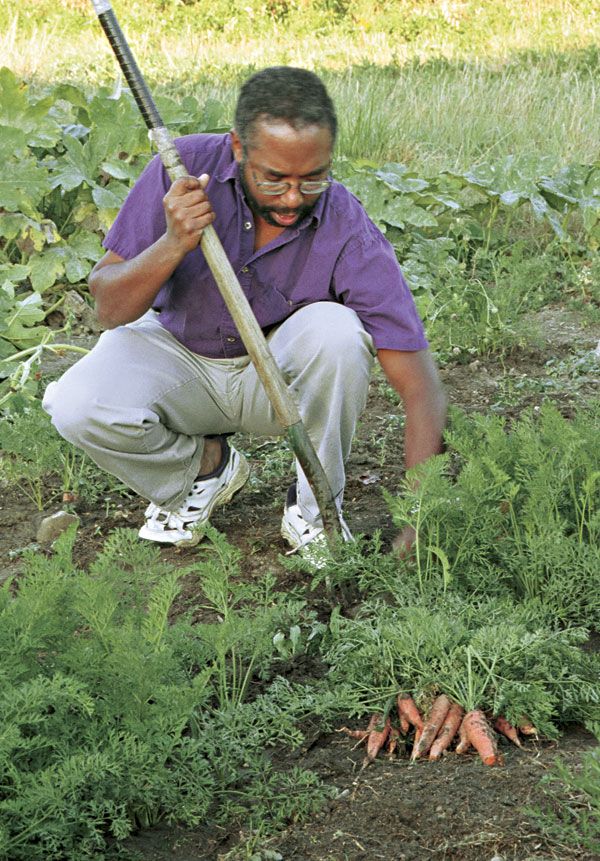
Make your soil hospitable to carrots
What does it take to grow scrumptious carrots? Can anyone grow them, no matter what type of soil he or she has in the garden? I think so, as long as the weather is not too hot, not too wet, and not too dry. Ideally, carrots prefer a loose and deep silty loam, but there are enough varieties so that gardeners blessed with less than ideal soils can match carrots with their soil types. To find out which varieties of carrots do well in your area, check with other gardeners, local horticulture clubs, or your cooperative extension office.
Don’t despair if your soil is heavy. Heavy soils contain a priceless reserve of minerals but need more care to develop. The shortest route to improving this type of soil is to adjust the pH and add organic matter. Carrots are really enlarged taproots; their root system is both wide and deep, and it responds well to a properly prepared seedbed. Research suggests that mineral soils produce more nutritious and flavorful root vegetables. I know from experience that this is true.
When working the soil for carrots, you should aim for a clod-free, uniform blend. A rule of thumb is to work the soil to twice the depth of the carrot you will be growing. Work in copious amounts of thoroughly composted or rotted organic matter, then pull the soil up into knee-high beds or mounds.
Here’s what works for me. First, I break up the hardpan as far down as I can reach, either with a tractor or by hand with a tool known as a broad fork (popular among French intensive gardeners). Next, I spread soil amendments or fertilizers. Then I rototill the entire area as deeply as my tiller will go (about 10 inches).
Carrots need a fairly nutrient-rich growing environment but don’t appear to be particular about the source of the food supply. My bias is for nonchemically fertilized growing. If you garden conventionally, apply N-P-K as recommended for your garden size.
Organic growers can add sufficient nitrogen by growing cover crops. Organic sources of nitrogen, such as blood or alfalfa meal, hoof and horn meal, and bat guano can also be used. Don’t use fresh manure as a source of nitrogen or you’ll likely find your carrots are hairy or forked.
Carrots grow best in the soil where the pH is between 5.5 and 7.0 and respond well to foliar fertilizers or to being side-dressed with granular fertilizers mid-season. Growing carrots in a rotation behind legumes or green manure can often reduce or eliminate the need for additional nitrogen, but test your soil to be certain.
Plant in beds to avoid compacting the soil
Because carrots do not grow well in compacted soil, plant them in raised beds. I make my tilled beds 2 to 4 feet wide and as long as I want. Using an Italian beet hoe, a stiff garden rake, or in a pinch, a simple hoe of the cement mixing type, I hill up the soil from both sides. I flatten the top and rake it smooth. I complete the job by making shallow rows perpendicular to the length of the bed, spaced 8 to 12 inches apart, and then sprinkling in the seeds.
In the home garden, carrots are usually planted 1 to 3 inches apart, depending on the mature size of the carrots. Varieties bred specifically to produce baby carrots, such as ‘Thumbelina’ or ‘Partima’, are usually planted closer together: 1 to 2 inches apart in rows 8 to 10 inches apart.
Cover the carrot seed with no more than ½ inch of fine soil, and be prepared to water frequently. I use floating row covers to help keep the ground moist, which also seems to help my carrots germinate and grow more uniformly. Row cover provides a consistent microclimate.
Carrots are notoriously slow to germinate in cool soils, often taking as long as 21 days to show up. In my raised bed system, carrots regularly come up in about 14 days.
Pestiferous creatures are mostly underground
In most areas, carrots are not troubled by many above-ground pests, and row cover will keep carrot rust flies, leafhoppers, and flea beetles at bay. In the ground, however, carrots may be troubled by nematodes, root maggots, or cutworms.
As an organic grower, I have had very good success using beneficial nematodes (Steinernema carpocapsae and Heterorhabditis) to control root maggots and cutworms. On the flip side, Nematrol nematocide will control most strains of harmful nematodes. If you know you have a problem with pest nematodes, there are several strategies you might try.
First, increase the levels of organic matter and humus in the soil to create a more hospitable environment for naturally occurring predators. Second, plan ahead. Certain plants exude chemicals from their roots that are toxic to nematodes; grow them the season prior to planting carrots. These include cowpeas, Sudan grass, canola, and oilseed radish. California poppies release nematocidal compounds after their first year in the ground, so if you have the space, plan them into the permanent landscaping of your garden.
Timing is the key to controlling weeds
Controlling weeds without herbicides can be difficult, but with planning, this problem can be diminished. Timing is the key to nonchemical, pre-emergent weed control in carrots. By taking advantage of the fact that many annual weeds sprout earlier than carrots, you can actually cultivate over the carrots before they come up.
Mark your calendar on the day you plant the carrots. Seven days later, go out and rake the bed lightly with a leaf rake, perpendicular to the direction of the rows. This will kill approximately 90 percent of annual weeds without harming the majority of your carrots. This works because carrots send out their taproots first, so that by the time the carrot top has emerged from the soil, the root may be as long as 3 or 4 inches. It is anchored fairly well compared with most broad-leafed weeds with shallow, fibrous root systems.
On day 14, prepare to do the same thing, but go out early in the morning when the light hits the garden at an oblique angle. Check first to see if the carrots are coming up. Newly sprouted carrots look like grass—they have two thin, straight leaves—and they can tolerate light cultivation. If the carrots have sprouted, you can still use the rake exactly as you did the first time, but don’t press down too hard. This will kill those weeds that have germinated since the last time you cultivated, leaving the carrots to come up with no competition. Repeat this process of inspecting and cultivating every four days until the carrots are completely sprouted.
The timing of this activity is one of the most crucial steps in my spring gardening. When I get it right, I hardly notice weeding the carrots, but if I get behind early in the season, it seems that I can never catch up. Once the carrots are up and established, I use a hand hoe or a wheel hoe once a week to cultivate between the rows.
Ongoing care and storage
Thinning carrots is one of my least favorite jobs, so I work diligently to avoid it. Thinning seems like a waste of effort as well as seed. Most carrots are too small to eat early on, and if thinning is done too late, the remaining carrots tend to be deformed. Avoid thinning by calibrating your planter so it spaces the seeds evenly at planting time, or by carefully sprinkling the seeds by hand if you are working on a small scale.
Once they are growing, carrots need at least 1 inch of water per week, more if conditions are exceptionally hot or dry. Consistent watering is crucial for optimal growth and color. Avoid extreme fluctuations of moisture, as this can cause carrots to split. They can tolerate frost, and they get sweeter when there is a substantial difference between day and night temperatures. This means that carrots grown in northern gardens will be sweeter than those grown where day and night temperatures are closer, and where soil temperatures are higher.
If you live in a place where the ground doesn’t freeze in the winter, you can leave carrots in the ground and harvest them when you want to eat them. Six inches of straw will insulate carrots in areas where the temperature doesn’t dip below 10˚F, but it may also become a home for mice or other rodents, which might, after all, eat your carrots.
Carrots destined for storage should be allowed to mature completely; 90 days is the standard time. Properly cooled, topped, and washed, mature carrots will store for as long as seven months at no lower than 32°F and 90 percent relative humidity. If you plan to grow lots of carrots, an extra refrigerator is one of the best storage places.
To store carrots, carefully cut off the entire green top with a sharp knife. Tops that are simply broken off tend to sprout, which shortens their storage life. Immerse the carrots in cold water, which will cool them and rinse off all the dirt.
Then separate the carrots by size, and group any damaged carrots with the smallest ones. Eat these first because they don’t store as well as larger, perfect carrots. Finally, put your carrots in perforated plastic bags and store them in the cellar or the refrigerator—another successful season packed away.
Seedbed preparation and planting
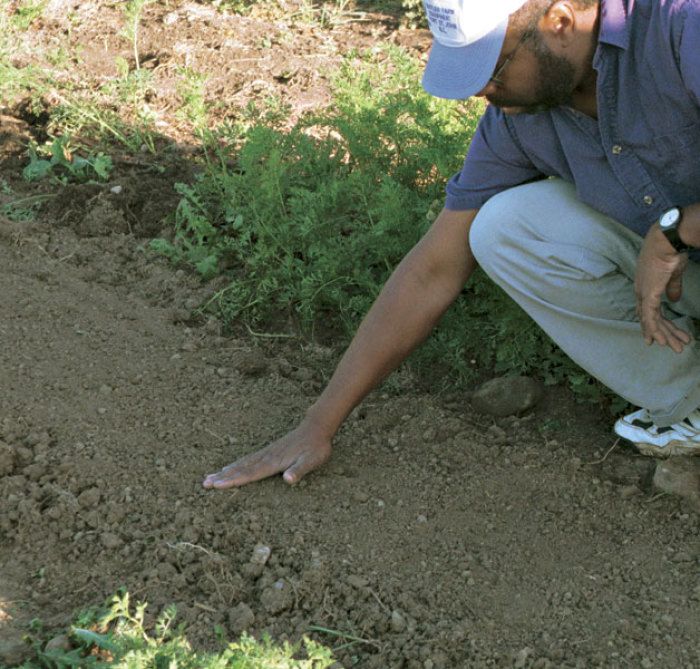
| 1. To prepare your seedbed prior to planting, turn the soil and work in well-aged organic material. | 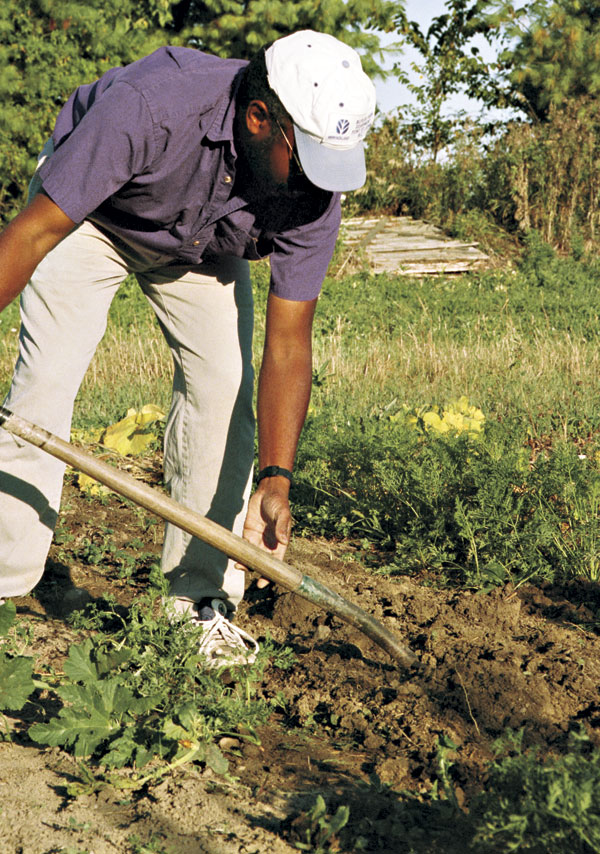 |
| 2. Pull soil up from the edges of your proposed bed to make a raised area at least 2 feet wide. | 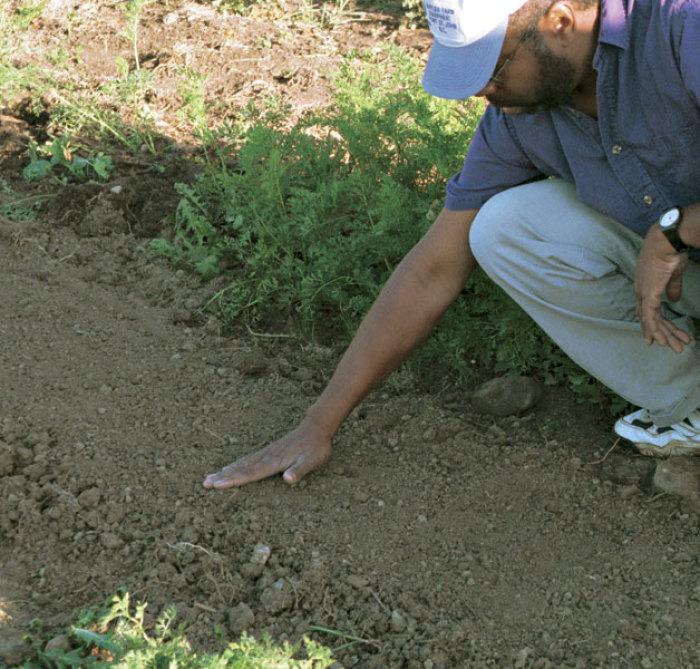 |
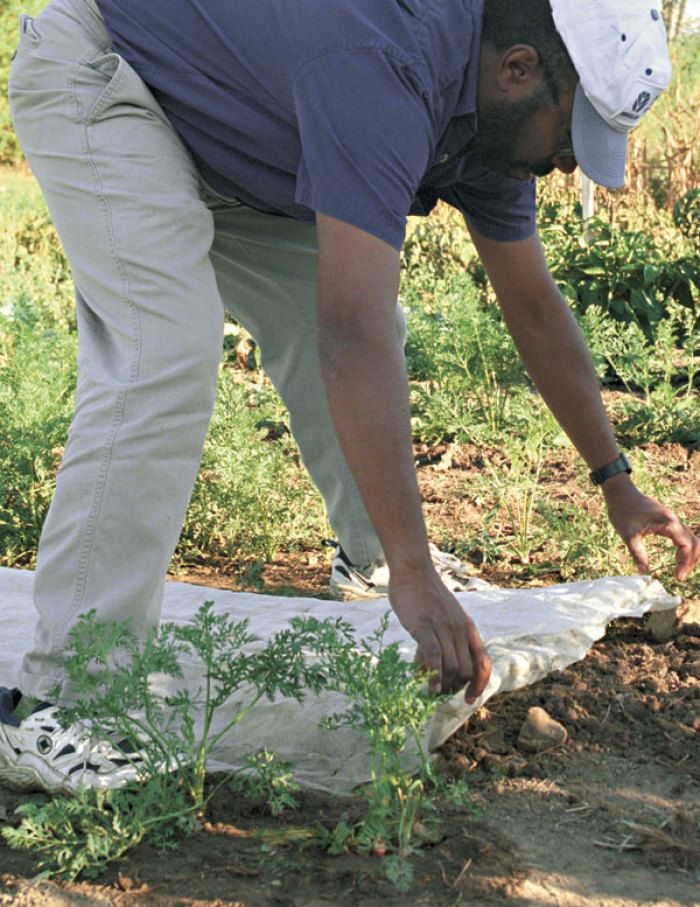
| 3. Mark rows that are 8 to 12 inches apart, depending on the expected size of the mature carrot. Cover the seed with half an inch or less of soil. | 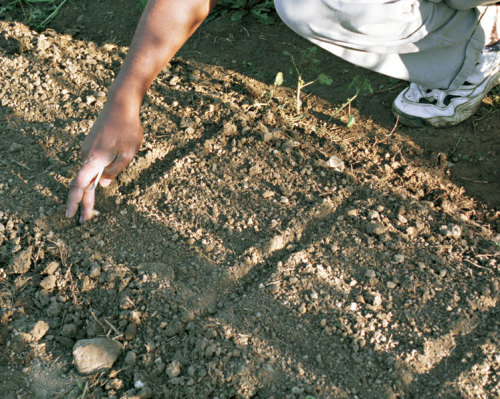 |
| 4. Use a row cover to help maintain moisture, giving carrot seeds a better chance to germinate, and seedlings a more uniform climate in which to grow. |  |
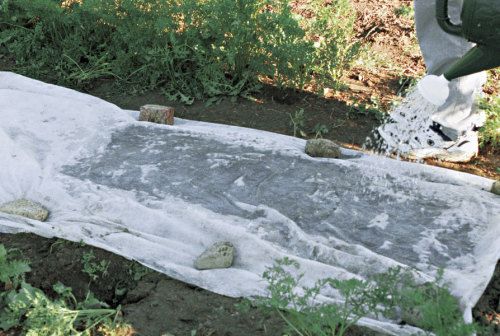
| 5. Water seeds through the row cover during their period of germination. |  |
|
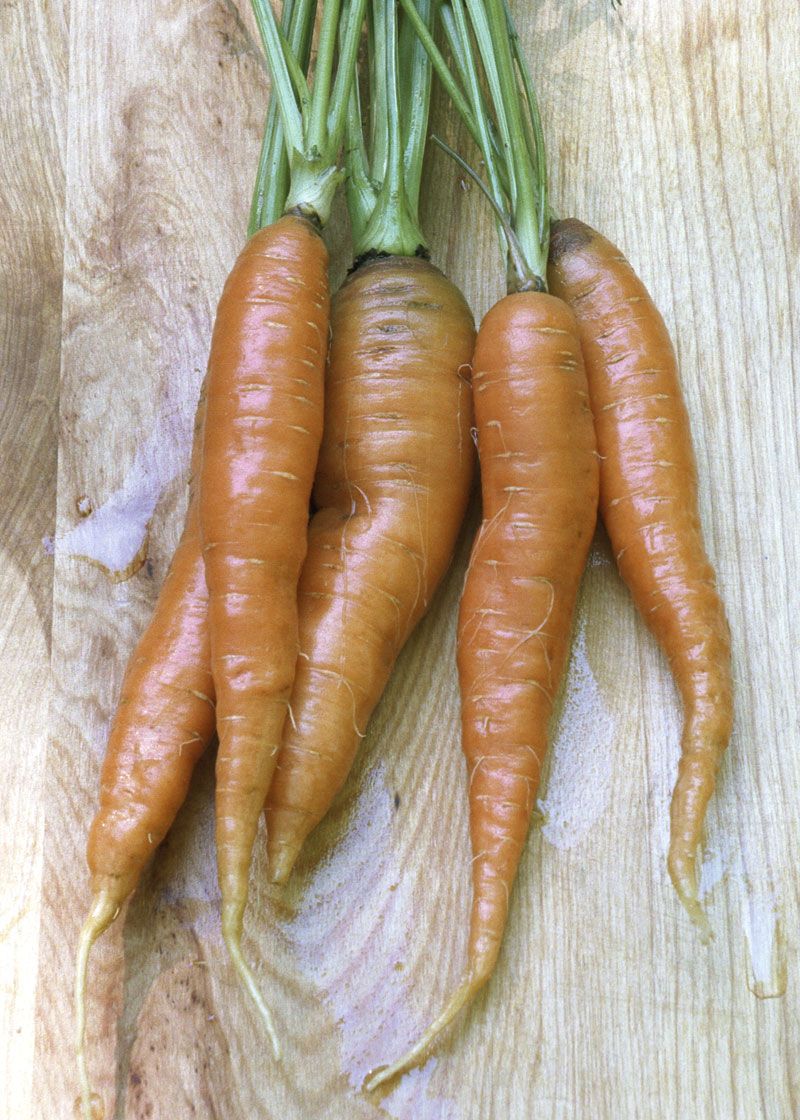
Chantenay carrots are 5 to 6 inches long, produce well in shallow or heavy soils, are multipurpose in the kitchen, and store well. Even under duress, they are likely to produce well. This year in Indiana we were locked in a drought, and except for hand-watering several times a week, my red coreless carrots received no water. Nonetheless, they did very well. I have had good success with ‘Supreme Long Chantenay’ and the Kuroda ‘Kinko’ for early carrots in new fields. ‘Danvers Half-Long’ has been around for as long as I can remember and always seems to do well. ‘Danvers 126’ grows exceptionally well in heavy soils. |
 |
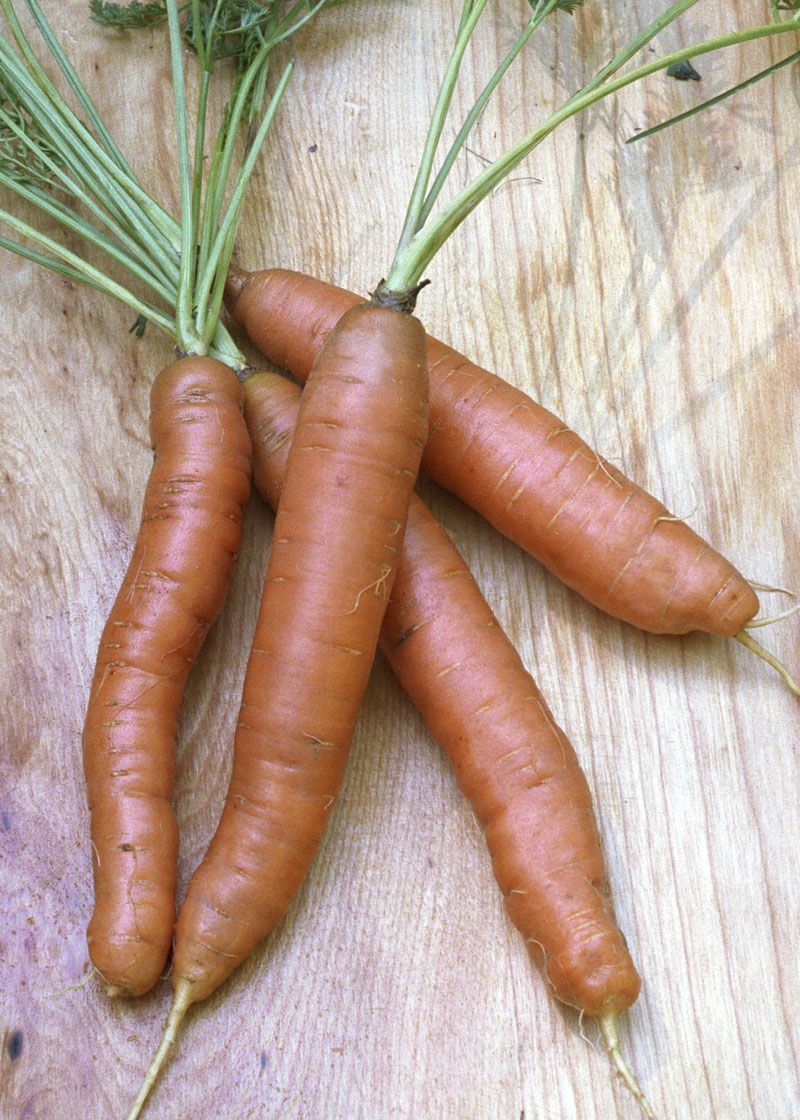
| Nantes carrots are usually cylindrical and blunt and range in size from 6 to 9 inches. They will grow in shallow, heavy soils. I enjoy many types of carrots, but I am partial to Nantes. Originally from France, Nantes carrots are the crispest, sweetest carrots around. I usually grow several varieties because I can’t decide on just one. I am fond of ‘Nelson’ and ‘Earlibird Nantes’ for early carrots, ‘Scarlet Nantes’ for nostalgic reasons, and, lately, ‘Bolero’ for a storage carrot. |  |
| Imperator carrots have enviably long, straight roots that taper to a graceful point, and they are not bashful about proclaiming the type and depth of soil they prefer. I have grown true Imperator carrots only once, in a raised bed with loamy soil in northeast Minnesota.
If you want to grow the long slender carrots frequently seen in the grocery store, make sure your soil qualifies. You will need 18 to 24 inches of loose, deep soil that drains well but is not too sandy. |
 |
This article originally appeared in Kitchen Gardener #24 (December 1999).


Comments
Log in or create an account to post a comment.
Sign up Log in